1. Introduction
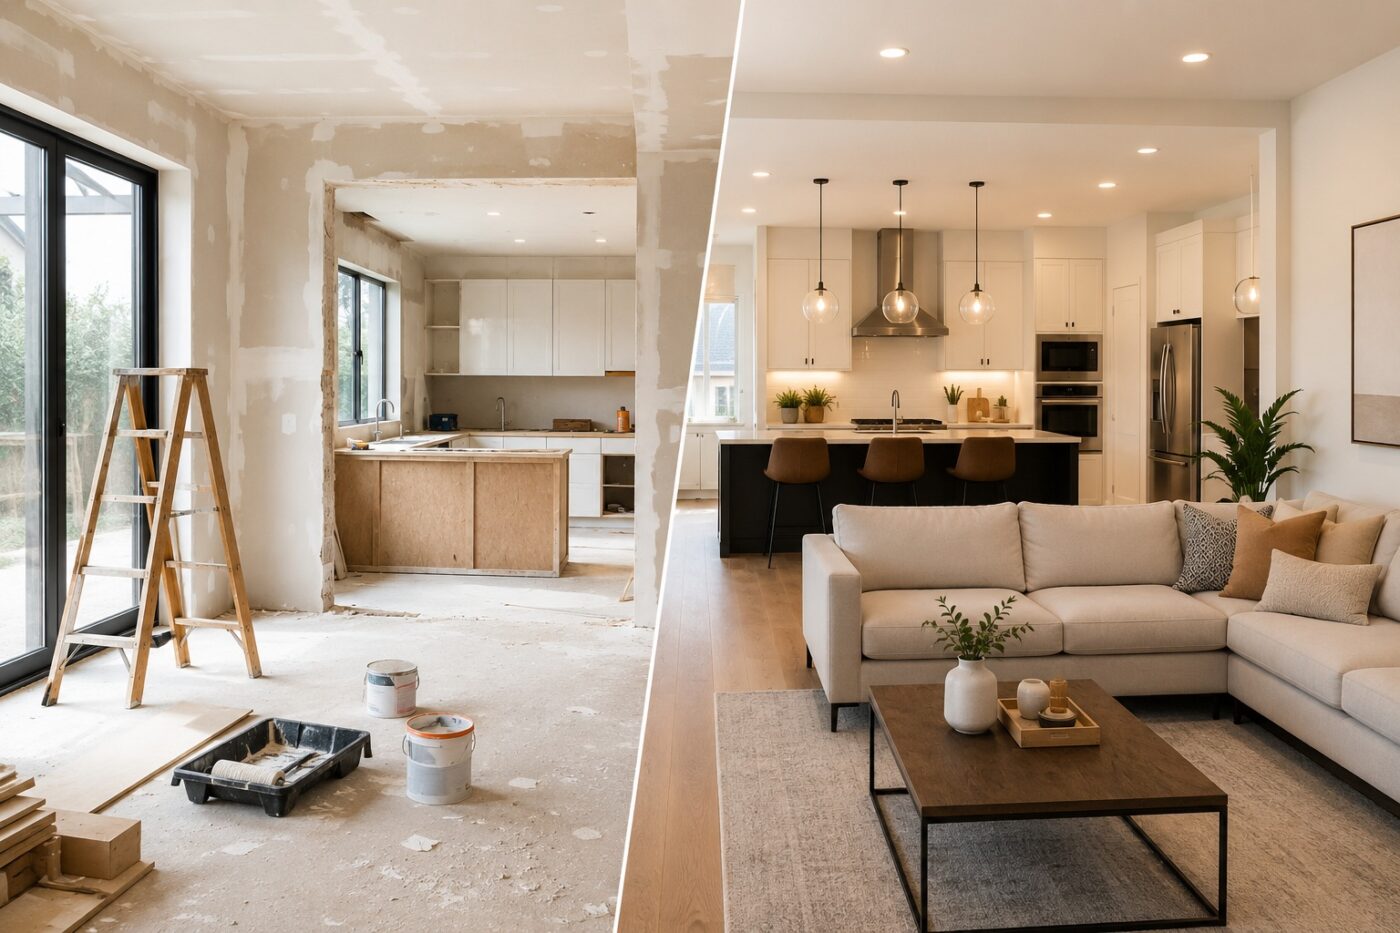
Renovating an old house can transform an aging property into a comfortable, functional, and energy-efficient home. However, the process involves much more than replacing flooring, painting walls, or installing a modern kitchen. Older buildings often contain outdated systems, hidden damage, and construction details that require special attention.
One of the biggest challenges of old house renovation is uncertainty. A property may look well maintained while concealing deteriorated electrical wiring, plumbing leaks, damaged structural components, or moisture problems. These issues can affect the renovation budget, construction schedule, and even whether the planned improvements are practical.
At the same time, older homes offer something that new construction cannot always reproduce: distinctive architecture, traditional craftsmanship, established surroundings, and original materials that contribute to the building's character.
A successful renovation should improve safety, comfort, and long-term durability without unnecessarily removing features that make the house unique.
Where Should You Start?
The most effective approach is to understand the building before deciding how to change it.
Start with a thorough property inspection and identify any structural, moisture-related, or safety problems. Next, establish renovation goals, investigate permit requirements, and prepare a realistic budget. Once the necessary repairs have been planned, organize the work so that structural and weatherproofing issues are addressed before vulnerable interior finishes.
Electrical, plumbing, heating, and ventilation upgrades should be coordinated before walls and floors are permanently closed. Insulation improvements must be compatible with the building's construction, while windows, doors, and original architectural features should be evaluated for repair or replacement.
Only after the essential work has been completed should the project move toward decorative finishes, furniture, and final details.
This guide explains how to renovate an old house step by step, including how to assess its condition, decide which repairs deserve priority, manage renovation costs, select appropriate materials, preserve architectural character, and avoid common problems.
Whether you are restoring a historic property, modernizing a family home, or planning to renovate an older house before moving in, understanding the process will help you make better decisions from the beginning.
2. Evaluate the Condition of the Old House
Before starting renovation work, it is essential to understand the actual condition of the property. A detailed inspection establishes what needs immediate attention, which components can be repaired, and where additional investigation may be necessary.
The age of a building alone does not determine its condition. A century-old house that has been maintained properly may require fewer repairs than a much newer property affected by water intrusion or poorly executed alterations.
The purpose of the initial assessment is to distinguish between normal signs of aging and defects that could compromise safety, durability, or comfort.
Inspect the Foundation and Structural Components
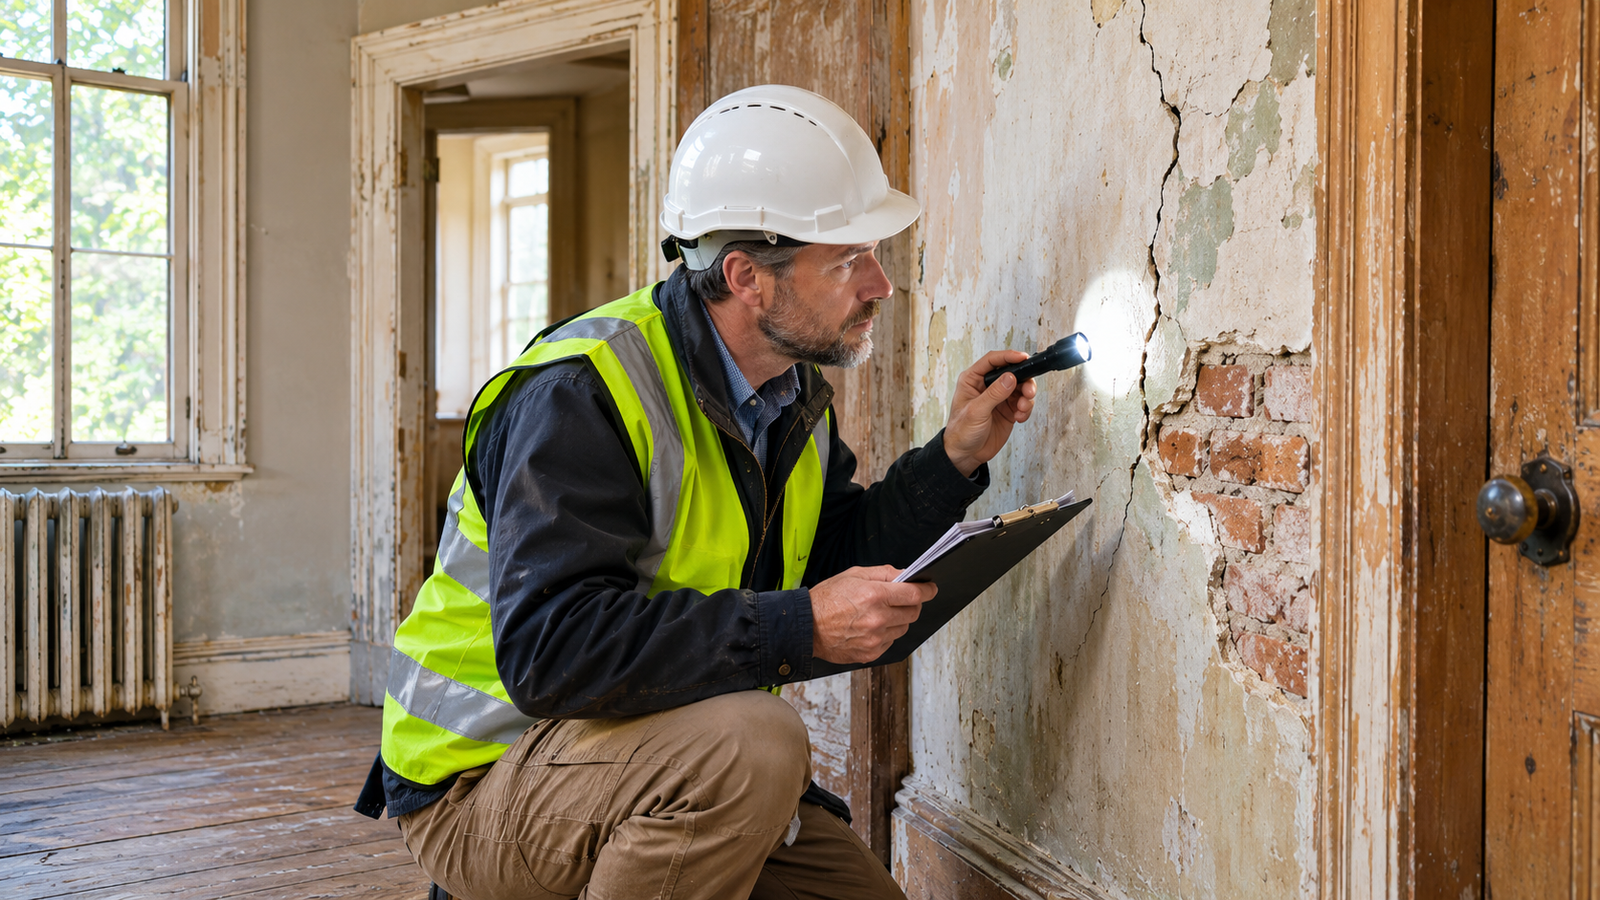
Begin by examining the foundation, load-bearing walls, floor structure, beams, and roof framing.
Look for unusual cracks, visibly displaced masonry, significant floor movement, sagging beams, or doors and windows that have become difficult to operate. These symptoms may indicate structural movement, but they do not automatically prove that the foundation has failed.
Some older houses have minor settlement that occurred many years ago and is no longer progressing. Other buildings may experience ongoing movement caused by drainage problems, unstable soil, deterioration, or unsuitable previous alterations.
An experienced structural engineer can help determine whether a defect is cosmetic, requires monitoring, or needs corrective work.
Structural stability should be confirmed before removing walls, changing room layouts, or introducing additional loads.
Examine the Roof, Walls, and Drainage
The building envelope protects the interior from rain, wind, and external moisture.
Inspect roof coverings, flashing, chimneys, gutters, downpipes, and visible roof framing. Water stains in the attic, damaged roofing materials, and deteriorated timber may indicate existing or previous leaks.
Exterior walls also deserve careful attention. Cracked render, deteriorated mortar joints, damaged siding, and defective window details can allow moisture to enter the building.
Pay particular attention to how rainwater moves away from the property. Overflowing gutters, blocked drains, and ground surfaces that direct water toward the foundation can contribute to long-term dampness.
Repairing the source of water intrusion is usually more important than immediately replacing damaged interior finishes.
Assess Electrical, Plumbing, and Heating Systems
Older houses may contain a mixture of original installations and upgrades completed at different times.
An electrician should assess the condition and capacity of the electrical installation, including the distribution panel, protective devices, wiring, outlets, and grounding or earthing arrangements.
The presence of older wiring does not by itself establish that complete replacement is necessary. Its condition, installation method, protection, and suitability for anticipated loads must be evaluated.
Plumbing inspections should consider pipe materials, visible corrosion, water pressure, drainage performance, and evidence of leaks. Where accessible, concealed or underground drainage systems may also require investigation.
Heating and ventilation equipment should be assessed for condition, safe operation, efficiency, and suitability for the proposed layout.
Identify Moisture and Indoor Air Quality Problems
Look for persistent damp patches, peeling finishes, musty odors, condensation, stained ceilings, and damaged timber.
These symptoms can have different causes. Moisture may enter through the roof or external walls, rise from the ground, escape from plumbing, or accumulate because of indoor humidity and inadequate ventilation.
Identifying the actual source is essential. Installing waterproof coatings or covering damp surfaces without understanding the cause can conceal damage and prevent the building from drying properly.
Where mold contamination or significant timber decay is suspected, specialist assessment may be necessary.
Record the Inspection Findings
A written condition report makes the next planning stages easier.
Photograph visible defects, note their locations, and record recommendations from inspectors or contractors. Separate urgent safety concerns from defects that require planned repairs and from improvements that are mainly cosmetic.
The following table provides a practical starting point.
| Finding | Possible concern | Recommended next step |
|---|---|---|
| Significant or changing wall cracks | Structural movement | Structural assessment |
| Recurring roof stains | Water intrusion | Roof and flashing inspection |
| Warm outlets or frequent breaker trips | Electrical defect or overload | Electrical safety inspection |
| Persistent damp or mold | Moisture source or ventilation problem | Identify and correct the cause |
| Sagging or soft flooring | Joist damage, moisture, or settlement | Inspect the floor structure |
| Corroded pipes or recurring leaks | Plumbing deterioration | Plumbing assessment |
| Cold rooms and strong drafts | Heat loss and air leakage | Energy assessment |
These observations help prioritize further investigation rather than providing a definitive diagnosis.
A thorough inspection is the foundation of every successful old house renovation. It reduces uncertainty and helps prevent unsuitable work from being included in the renovation plan.
3. Set Renovation Goals and Priorities
Once the condition of the house is understood, the next step is defining what the renovation should achieve.
A clear set of goals prevents the project from becoming a collection of unrelated improvements. It also makes decisions easier when the available budget or construction time is limited.
Decide How Extensive the Renovation Should Be
A cosmetic renovation focuses primarily on appearance and minor improvements. Painting, restoring finishes, updating lighting, and replacing worn surfaces may be sufficient when the building is already safe and functional.
A partial renovation addresses selected areas or systems. For example, a homeowner may renovate the kitchen and bathrooms while upgrading electrical circuits and improving attic insulation.
A comprehensive renovation may involve substantial structural repairs, replacement of building services, insulation upgrades, and reconstruction of interior spaces.
The appropriate approach depends on the actual condition of the property rather than its age alone.
Establish a Clear Order of Priorities
Renovation priorities should reflect the consequences of leaving a problem unresolved.
Problems that threaten structural stability, electrical safety, or protection from water normally deserve attention before decorative upgrades.
Once immediate defects are addressed, homeowners can focus on functional improvements such as heating, ventilation, plumbing, accessibility, and energy performance.
Cosmetic improvements can then be selected according to the remaining budget and personal preferences.
This approach prevents expensive finishes from being damaged by repairs that should have been completed earlier.
Consider How the Home Will Be Used
A renovation should support the way people actually live.
For a permanent family home, practical priorities may include comfortable room temperatures, durable materials, sufficient storage, safe stairs, and easily maintained kitchens and bathrooms.
A property intended for resale may require a different balance between investment and expected market value.
Homeowners planning to remain in the property for many years may also consider future accessibility, including easier bathroom access, safer circulation routes, and layouts that can accommodate changing needs.
Establish a Consistent Design Direction
Older homes often benefit from a design approach that respects their original architecture.
This does not mean every room must look historical. Contemporary furniture, modern bathrooms, and efficient lighting can work well alongside restored woodwork, traditional doors, and original flooring.
However, selecting materials and finishes independently for each room can lead to an inconsistent result.
Before purchasing expensive items, establish a general color palette, flooring strategy, lighting plan, and approach to original architectural details.
The goal is to make the renovated house feel like one coherent property rather than a series of unrelated remodeling projects.
4. Understand Local Building Codes and Permits
Legal requirements should be investigated before construction begins, especially when the project involves structural alterations, extensions, electrical systems, plumbing, or changes to the exterior.
Building regulations differ between countries and may also vary between regions, municipalities, and individual properties. A type of work that requires formal approval in one location may be subject to different procedures elsewhere.
Therefore, homeowners should never assume that general renovation advice provides a complete list of legal requirements for their property.
Determine Which Approvals Are Necessary
Start by describing the proposed renovation and contacting the appropriate local building or planning authority.
Depending on the jurisdiction, approval may be required for removing load-bearing walls, altering the roof structure, constructing extensions, changing openings, or undertaking major electrical and mechanical installations.
Even when a project does not require a building permit, the completed work may still need to meet applicable technical and safety requirements.
The absence of a permit requirement does not automatically mean that a homeowner can carry out every part of the work without qualified assistance.
Understand Restrictions on Historic Properties
A house does not need to be extremely old to have heritage-related restrictions.
Properties designated as historic, listed, protected, or located within conservation areas may be subject to additional controls.
These restrictions can affect window replacement, facade alterations, roofing materials, demolition, and changes to significant interior features.
Before planning substantial alterations, determine whether the property has protected status and whether specialist approval is necessary.
Coordinate Inspections With Construction
Some renovation work must be inspected before it is covered by plasterboard, flooring, or other finishes.
Depending on local requirements, this can involve structural elements, electrical installations, plumbing, insulation, and fire-safety measures.
Schedule these inspections as part of the construction plan rather than treating them as final administrative tasks.
Covering work prematurely may require finished surfaces to be reopened.
Keep Proper Documentation
Maintain copies of approved plans, permits, inspection records, contractor agreements, warranties, and relevant invoices.
A photographic record of concealed wiring, plumbing routes, and completed structural work can also be useful for future maintenance.
Complete documentation helps homeowners understand what was changed and may assist with insurance, resale, or later renovation work.
5. Create a Realistic Renovation Budget
Budgeting for an old house requires more than calculating the cost of visible improvements.
The largest financial uncertainties often involve work hidden beneath existing finishes or repairs that cannot be fully defined before construction begins.
A useful renovation budget should distinguish between known work, possible additional repairs, professional services, and money reserved for uncertainty.
Build the Budget Around Actual Findings
Begin with the inspection report and proposed scope of work.
Ask qualified contractors to prepare itemized estimates that clearly identify labor, materials, equipment, and exclusions.
Where structural engineering, specialist inspections, hazardous-material assessments, or design services are necessary, include them in the budget from the beginning.
Do not rely on broad national averages to determine the cost of a specific property. Labor rates, construction techniques, materials, and legal requirements vary considerably across markets.

Organize Costs Into Practical Categories
| Budget category | What to include |
|---|---|
| Planning and professional services | Surveys, engineering, design, permits, specialist assessments |
| Structural and exterior work | Foundation, framing, roofing, masonry, drainage |
| Building systems | Electrical, plumbing, heating, cooling, ventilation |
| Energy improvements | Insulation, air sealing, glazing upgrades |
| Interior reconstruction | Plaster, walls, ceilings, subfloors, flooring |
| Kitchens and bathrooms | Waterproofing, fixtures, cabinets, appliances |
| Finishing and completion | Painting, trim, hardware, cleanup, inspections |
| Contingency | Unforeseen repairs and approved changes |
This structure makes it easier to compare estimates and identify work that may be postponed.
Include a Contingency Reserve
A contingency reserve provides financial flexibility when unexpected defects are discovered.
A reserve in the range of 15–30% is sometimes used as an initial planning allowance for renovation projects, but it is not a universal standard or a guarantee that unexpected costs will be covered.
A well-inspected property with a clearly defined scope may have less uncertainty than an old building requiring extensive demolition and exploratory repairs.
For example, if the total available budget is divided into 100 units and 20 units are reserved for unforeseen work, only 80 units should be committed to the original project scope.
This distinction matters because calculating a reserve after committing the entire budget would require additional funding.
The appropriate contingency should be determined according to the property's condition, the quality of available information, and the risks involved.
Avoid Confusing Quotes With Final Costs
A contractor's estimate may exclude concealed damage, additional structural work, disposal fees, or certain finishing materials.
Before accepting a quote, confirm what is included, what is excluded, and how unexpected work will be priced.
Written change orders are particularly valuable. They document the cost and schedule implications of modifications before the additional work proceeds.
Control Spending During Construction
Keep a record of agreed prices, payments, invoices, and approved changes.
Review the budget regularly against completed work rather than waiting until the end of the renovation.
When expenses increase, protect funding for essential repairs before reducing budgets for critical safety or durability work.
If necessary, postpone nonessential decoration, landscaping, or furniture rather than compromising the quality of important building systems.
Consider Renovation Versus Rebuilding
Sometimes a property requires such extensive work that rebuilding deserves serious consideration.
The decision should account for more than the estimated construction cost.
| Consideration | Renovation may be preferable when… | Rebuilding may deserve consideration when… |
|---|---|---|
| Structural condition | Major components can be safely retained | Severe defects affect much of the structure |
| Building layout | The existing arrangement can be adapted | Required changes are extensive and impractical |
| Original features | Valuable details are worth preserving | Few recoverable features remain |
| Legal restrictions | Renovation is permitted and practical | Demolition and rebuilding are legally possible |
| Financial comparison | Repairs offer acceptable long-term value | Total renovation costs approach or exceed a suitable replacement |
| Project goals | Historical character is a priority | A substantially different building is needed |
Neither option is automatically cheaper or better. Demolition, waste disposal, permits, site conditions, and new-construction costs must be included in a genuine comparison.
For protected historic properties, demolition may not be legally available at all.
6. Plan the Renovation in the Correct Order
The sequence of renovation work has a major influence on cost, efficiency, and the quality of the finished home.
Completing tasks in the wrong order can damage finished surfaces, require repeated labor, or conceal defects before they are corrected.
However, there is no single construction sequence that applies to every old house. Emergency weatherproofing, structural stabilization, and hazardous-material management may require a different order depending on the building's condition.
The general principle is to make the property safe, protect it from further damage, complete concealed work, and only then install vulnerable finishes.
Step 1 — Make the Property Safe and Prevent Further Damage
Before extensive construction begins, address immediate hazards.
An unstable structure may require temporary support. An active roof leak may need urgent weatherproofing to prevent further interior deterioration.
Utilities must be assessed and safely isolated where necessary by appropriately qualified personnel.
Suspected asbestos-containing materials, lead-contaminated surfaces, and other hazards should be evaluated before they are disturbed.
These precautions establish safer conditions for the remaining work.
Step 2 — Complete Structural Repairs
After the necessary investigations and temporary protection, structural repairs can proceed according to an approved plan.
Work may involve stabilizing foundations, strengthening floor structures, repairing timber framing, or modifying load-bearing walls.
Where structural alterations affect the roof or external walls, the sequence must be coordinated carefully so the building remains stable and protected throughout construction.
Structural work should be designed and supervised by professionals with suitable experience.
Step 3 — Repair the Roof, Exterior, and Drainage
A reliable building envelope is essential before investing in sensitive interior materials.
Repair roof coverings, flashing, gutters, external walls, and drainage defects that allow water to enter the property.
Particular attention should be given to junctions around chimneys, roof penetrations, windows, and doors.
The objective is not simply to improve the exterior appearance, but to create a durable barrier against weather while maintaining appropriate moisture movement through the construction.
Step 4 — Carry Out Controlled Demolition and Preparation
Once the property is safe for the proposed work, remove selected finishes and components according to the renovation plan.
Demolition may reveal previously concealed damage, which should be documented and assessed before construction continues.
Original doors, decorative elements, reusable timber, and other features identified for preservation should be protected or carefully removed for restoration.
Demolition should not proceed into unassessed structural elements or suspected hazardous materials.

Step 5 — Install or Upgrade Concealed Building Systems
Electrical wiring, plumbing, drainage, and the concealed parts of heating and ventilation systems should be coordinated before walls and ceilings are closed.
This stage may involve new pipe routes, electrical circuits, ventilation ducts, equipment connections, and preparations for kitchens and bathrooms.
The exact layout of these systems should be planned together. Poor coordination can result in unnecessary drilling, structural conflicts, or insufficient space for insulation.
Required inspections and testing should take place before concealed systems become inaccessible.
Step 6 — Improve Insulation, Airtightness, and Windows
Once the necessary repairs and service installations are complete, proceed with the approved insulation and air-sealing measures.
The construction type and moisture behavior of the building must determine which insulation systems are appropriate.
External windows and doors may need to be repaired or installed earlier in the project to make the building weather-resistant. Their precise timing depends on the surrounding structural and finishing work.
Airtightness improvements should be coordinated with ventilation and combustion-appliance safety.
Step 7 — Reconstruct Walls, Ceilings, and Subfloors
After concealed work has been checked, interior surfaces can be repaired or rebuilt.
Traditional plaster may be repaired in place, while other areas may require new finishes.
Subfloors should be assessed for structural adequacy, levelness, movement, and moisture conditions before new flooring is installed.
Allow sufficient drying or curing time for relevant materials.
The precise sequence of flooring, cabinetry, and other finishes depends on the products and installation methods selected.
Step 8 — Complete Kitchens and Bathrooms
Kitchens and bathrooms require particularly careful coordination.
Waterproofing, ventilation, electrical protection, and plumbing connections must be completed correctly before decorative finishes conceal the work.
Cabinets, countertops, appliances, sanitary fixtures, and final accessories can then be installed according to the agreed schedule.
Bathrooms should be checked for proper drainage, watertightness, and ventilation before normal use.
Step 9 — Finish the Interior
Once the major construction work is complete, attention can move to painting, trim, interior doors, lighting fixtures, hardware, and decorative details.
Original features that were protected or removed for restoration can be reinstated.
Finished surfaces should be protected while remaining work continues.
Step 10 — Test, Inspect, and Complete the Project
Before the renovation is considered finished, the completed systems should be tested and the work reviewed against the agreed specifications.
Check electrical installations, plumbing fixtures, heating and ventilation performance, window and door operation, and the quality of visible finishes.
Any remaining defects should be recorded in a final punch list, with responsibility and completion dates agreed with the relevant contractor.
Keep all final inspection certificates and operating instructions.
A Practical Renovation Sequence
For quick reference, the overall process can be summarized as follows:
Inspection → Safety and temporary protection → Structural repairs → Weatherproofing → Controlled demolition → Concealed systems → Insulation and ventilation → Interior reconstruction → Kitchens and bathrooms → Finishing → Final inspections.
This sequence represents the normal dependencies between major tasks. Actual projects may have overlapping stages or require a different order to address urgent risks.
7. Preserve the Character of the Old House
One of the most appealing aspects of renovating an old house is the opportunity to retain its distinctive architectural identity.
Original materials, room proportions, traditional construction techniques, and decorative details can contribute significantly to the atmosphere of the property.
Preservation does not mean avoiding modernization. It means identifying what is worth keeping and incorporating necessary improvements without unnecessary damage.
Identify Features Worth Preserving
Walk through the house and record original elements before demolition begins.
Hardwood floors, timber doors, decorative plaster, staircases, fireplaces, wall paneling, and traditional window frames may be suitable for repair.
Not every old component is historically significant or worth retaining. Decisions should consider condition, craftsmanship, architectural importance, repair cost, and practical usefulness.
A damaged feature should not be removed automatically without investigating whether a durable repair is possible.

Restore Original Materials Where Practical
Restoration often involves localized repairs rather than complete replacement.
Solid timber doors may be adjusted, repaired, and refinished. Original flooring may be carefully restored if sufficient sound material remains. Traditional plaster can sometimes be stabilized or repaired without removing entire walls.
Historic masonry may require compatible mortar and carefully selected repair techniques.
The assumption that an old material is always stronger or better than a modern equivalent is misleading. Performance depends on its original quality, current condition, and intended use.
The primary advantage of preservation is retaining sound, repairable material and the building's architectural character.
Integrate Modern Improvements Carefully
Electrical systems, heating equipment, ventilation, and modern kitchens can often be installed without eliminating every traditional feature.
For example, new services can be routed through less significant spaces where practical, while decorative plasterwork or original joinery is retained.
A contemporary kitchen may complement an old house when its proportions, materials, and colors work with the surrounding architecture.
Avoid forcing an open-plan layout simply because it is fashionable. Older room arrangements may provide useful separation, privacy, and acoustic comfort.
Treat Historic Windows Individually
Original windows should be assessed for their actual condition and performance rather than replaced solely because they are old.
Repairing frames, improving weatherstripping, restoring glazing details, or installing compatible secondary glazing may improve comfort while preserving character.
When replacement is necessary, consider how the new windows will affect the building's proportions and appearance.
Protected historic properties may require specific restoration methods or approval.
The best result is one that improves the home's usability while retaining the features that give it identity.
8. Upgrade Energy Efficiency
Energy improvements can make an old house more comfortable and reduce the energy needed for heating and cooling.
However, renovating older buildings requires more than simply installing thicker insulation or replacing every window.
A successful energy upgrade should consider the entire building, including its construction, existing moisture conditions, heating equipment, ventilation, and local climate.
Start With an Energy Assessment
Before choosing improvements, identify where the building is losing energy and why occupants experience discomfort.
An energy assessment may examine insulation, air leakage, heating performance, glazing, thermal bridges, and ventilation.
Professional testing, such as a blower-door assessment or thermal imaging under suitable conditions, may help reveal problems that are difficult to identify visually.
Not every property needs every possible upgrade. The purpose of the assessment is to select improvements that offer meaningful benefits without introducing new risks.
Improve Attic and Roof Insulation
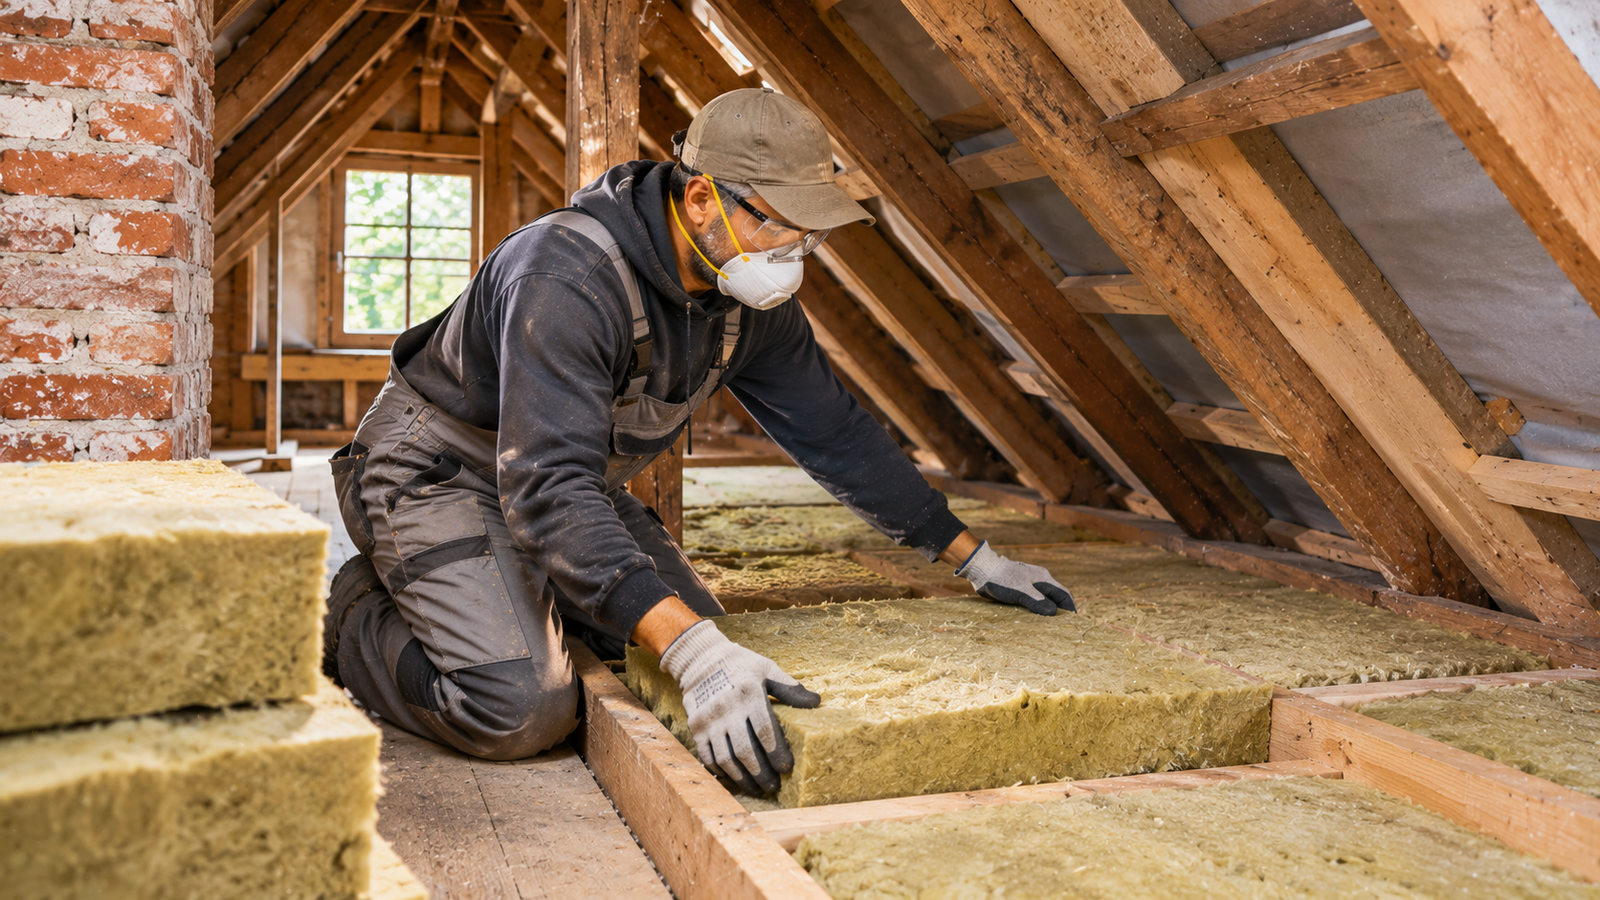
Attics and roof spaces can be important sources of heat loss, particularly where insulation is insufficient or poorly installed.
In a vented attic, air leakage through the ceiling should generally be addressed before additional insulation is installed.
The insulation strategy must also account for ventilation paths, moisture control, electrical equipment, and safe clearances around heat-producing components.
Older roofs may require repairs before insulation work can begin.
A roof assembly that is wet or damaged should not simply be covered with new insulating material.
Insulate Walls According to Their Construction
Wall insulation requires particular care in traditionally constructed buildings.
Solid brick, stone, earth, timber-framed, and cavity-wall systems behave differently.
Traditional permeable walls may absorb and release moisture through mechanisms that can be disrupted by unsuitable insulation, finishes, or vapor-control layers.
Internal insulation may change the temperature of the original wall and increase moisture-related risks if poorly designed. External insulation can provide good thermal continuity in suitable buildings, but may alter historic facades and require changes to windows, roof edges, and architectural details.
Before installing wall insulation, identify the construction type, resolve moisture defects, and have the proposed assembly assessed for local climate and exposure conditions.
No insulation product should be treated as universally suitable for all old houses.
Reduce Unwanted Air Leakage
Drafts commonly occur around windows, doors, attic hatches, service penetrations, and junctions between building components.
Weatherstripping, appropriate sealants, and carefully designed air barriers can improve comfort and reduce uncontrolled heat loss.
However, airtightness improvements should not be confused with eliminating ventilation.
A tighter house may require additional ventilation measures, particularly in kitchens, bathrooms, and spaces containing fuel-burning appliances.
Adequate combustion air and safe exhaust arrangements must be maintained.
Modernize Heating and Cooling
An old heating system may be inefficient, poorly controlled, or incorrectly sized for the renovated house.
Possible upgrades include efficient boilers, heat pumps, modern distribution systems, zoning controls, and improved thermostats.
The appropriate choice depends on climate, fuel availability, installation cost, energy prices, and the thermal characteristics of the building.
Heat pumps can operate successfully in many older homes, including properties that have not undergone complete reconstruction. However, system sizing, operating temperatures, existing heat emitters, and building heat loss must be evaluated.
Major insulation improvements may change the required heating and cooling capacity, so equipment selection should be coordinated with the final energy-upgrade plan.
Improve Ventilation and Indoor Comfort
Good ventilation helps control indoor humidity and remove contaminants.
Bathrooms and kitchens need effective moisture extraction, while whole-house ventilation requirements depend on building airtightness, occupancy, and local standards.
In some renovations, mechanical ventilation with heat recovery may be appropriate. Other buildings may be adequately served by a different correctly designed ventilation strategy.
The objective is to provide reliable fresh air without unnecessary energy waste.
Evaluate Improvements Over Their Lifetime
The most expensive upgrade does not automatically produce the best result.
Compare installation cost, expected performance, maintenance requirements, durability, and the potential effect on original materials.
Restoring windows and reducing drafts may be sensible before investing in complete window replacement. Similarly, correcting a damp wall can be more urgent than adding insulation to it.
Energy efficiency is most successful when improvements work together rather than being selected independently.
9. Common Problems Found During Old House Renovation
Even a detailed initial inspection cannot reveal every concealed defect.
Once selected finishes are removed, previously inaccessible parts of the structure may expose damage, unsuitable repairs, or materials that require specialist handling.
The important question is not whether unexpected problems will appear, but whether the project has a process for responding to them.
Structural and Timber Deterioration
Hidden timber damage may become visible beneath floors, inside walls, or around roof structures.
Some defects develop from long-term water exposure, while others result from insects, inadequate support, or alterations made by previous owners.
The correct response depends on whether the affected component is structural.
Significant damage should be assessed before the timber is removed or additional loads are introduced.
Localized repairs may be sufficient in some cases, while more extensive intervention may be necessary where structural capacity has been reduced.
Water Intrusion and Mold
Water stains and mold should be investigated to determine their source.
A plumbing leak requires a different solution from condensation or rainwater penetration.
Before replacing damaged materials, resolve the cause and establish that the affected area can dry adequately.
Porous materials with significant mold contamination may need to be removed, while other surfaces may be treatable using appropriate procedures.
Painting over mold or covering persistent dampness does not solve the underlying problem.
Hazardous Building Materials
Some older buildings contain asbestos in insulation, flooring products, pipe coverings, and other materials.
Its presence cannot be reliably confirmed by appearance alone.
Where suspicious material will be disturbed, a suitably qualified professional should assess whether testing is necessary. Undisturbed materials may sometimes be safely managed in place, depending on their condition and applicable requirements.
Lead-based paint is another possible hazard in older buildings. In the United States, homes built before 1978 are a particular concern because of historical paint regulations. Other countries have different histories and legal requirements.
Sanding, demolition, and other activities can spread hazardous dust if appropriate precautions are not taken.
Suspected hazardous materials should not be disturbed during exploratory demolition without an appropriate assessment.
Hidden Plumbing and Electrical Defects
Previous renovations sometimes leave behind inaccessible pipe joints, unsafe wiring modifications, or inadequate protection.
Discovering these defects may require the original renovation scope to be revised.
Repairs should address the underlying defect rather than simply conceal it behind new finishes.
Where installations are being replaced, documenting routes and connections can simplify future maintenance.
What to Do When Unexpected Damage Is Found
If a potentially serious problem appears, pause the affected work and make the area safe.
Document what was discovered, obtain an appropriate professional assessment, and identify the consequences for the design, budget, and schedule.
Do not authorize unnecessary reconstruction before the cause and extent of the defect are understood.
A controlled response may prevent a localized issue from becoming a larger renovation problem.
10. DIY vs Hiring Professionals
Doing some renovation work yourself can reduce labor expenses and provide greater flexibility.
However, the potential savings must be balanced against the time required, quality expectations, safety risks, and local legal requirements.
This balance is especially important in older homes, where apparently straightforward tasks may reveal concealed hazards.
Work That May Be Suitable for DIY
Many homeowners can complete painting, basic decorating, furniture assembly, simple landscaping, and certain flooring or trim projects.
The suitability of a task depends on the condition of the work area and the homeowner's actual skills.
Painting a modern, sound surface is very different from sanding unknown coatings in a historic property.
Similarly, installing floating flooring over a properly prepared subfloor may be manageable, while repairing a damaged structural floor requires specialist knowledge.
Even nonstructural demolition should begin only after relevant hazards, hidden services, and the building components involved have been assessed.
Work That Usually Requires Professional Expertise
Structural alterations, major electrical work, gas installations, significant plumbing modifications, roofing at height, and hazardous-material remediation generally require qualified professionals.
These activities can create serious consequences when performed incorrectly.
Some jurisdictions also require licensed or certified contractors for specific work.
Professional involvement is particularly important when work affects concealed systems that will become difficult to inspect or repair after completion.
Compare the Real Cost of DIY
The financial benefit of DIY should include more than the quoted labor saving.
Tools, protective equipment, disposal fees, material waste, and the value of time all affect the actual cost.
Mistakes can also require professional correction.
Before choosing DIY, consider whether the task can be completed safely, whether the result will meet the required standard, and whether the expected savings justify the additional time and risk.
Use a Hybrid Approach
A combined strategy often works well.
Qualified contractors can handle structural repairs, building systems, waterproofing, and other specialized work, while homeowners complete suitable cosmetic and finishing tasks.
This arrangement can preserve some flexibility without compromising critical parts of the renovation.
The key is clear coordination. DIY work should not interfere with inspections, warranties, or the contractor's agreed construction schedule.
11. How Long Does an Old House Renovation Take?
Renovation duration depends on the size of the property, its condition, the amount of work required, and the availability of contractors and materials.
A house needing only surface repairs may be completed relatively quickly. A property requiring extensive structural work and replacement of major systems may take many months or longer.
No single timeline can reliably describe every old house renovation.
Understand the Main Scheduling Factors
The condition of the building is often the largest source of uncertainty.
Hidden defects can delay work while engineers investigate problems, revised solutions are approved, or additional materials are obtained.
Permit processing may also affect the schedule, particularly where structural alterations or heritage restrictions are involved.
Custom windows, specialist restoration materials, and made-to-order cabinetry may require longer procurement periods than commonly available products.
Contractor scheduling adds another layer of complexity because several trades may need to complete their work in a specific order.
Allow Time for Different Renovation Scopes
For preliminary planning, a cosmetic update may take several weeks or months, while a partial renovation involving several rooms or systems can extend over multiple months.
A comprehensive renovation that includes major structural repairs and reconstruction may require much of a year or longer.
These are broad illustrative scenarios, not verified average durations or guarantees.
A small property with uncomplicated access and reliable contractors may progress faster than a larger building with extensive defects or protected architectural features.
Understand Task Dependencies
Some activities can happen simultaneously, while others must wait.
For example, suitable exterior repairs and certain interior preparations may overlap if the work can be coordinated safely.
By contrast, concealed plumbing and electrical installations generally need to be completed and inspected before the relevant walls are closed.
Waterproofing, plaster, screeds, coatings, and adhesives may also require specific curing or drying conditions before subsequent work can proceed.
Ignoring these requirements to accelerate the schedule can cause defects that appear after completion.
Create a Flexible Construction Schedule
A useful schedule should identify major milestones, decisions, inspections, and material delivery dates.
It should also distinguish between tasks that control the overall completion date and those that can be delayed without affecting other work.
Avoid constantly changing layouts or specifications after installation begins.
Where unexpected defects are discovered, update the schedule based on the revised scope rather than insisting on the original completion date.
Decide Whether to Live in the House
Remaining in the property during renovation may be manageable when work is limited to separate rooms or completed in carefully planned stages.
Extensive demolition, hazardous-material remediation, major structural alterations, and prolonged loss of essential utilities may make temporary relocation necessary.
The decision should be based on actual safety and living conditions, not simply convenience.
12. Best Materials for Renovating an Old House
Selecting renovation materials requires understanding the existing building.
Traditional houses may contain solid masonry, timber framing, older cavity walls, or combinations of different construction methods.
Materials that perform well in one building can behave differently in another, especially where moisture and temperature movement are involved.
The objective is to choose materials that are compatible with the existing structure and suitable for the property's climate, use, and maintenance requirements.
Structural Repair Materials
Structural repairs may involve timber, engineered wood, steel, masonry, or concrete.
The appropriate solution depends on the structural design and the existing components.
Original timber can sometimes be retained through localized repairs or reinforcement, while severely deteriorated sections may require replacement.
New structural members should be selected according to engineering requirements rather than appearance alone.
Masonry, Mortar, and Plaster
Traditional masonry buildings may contain relatively soft brick or stone laid with lime-based mortar.
Using an excessively hard or poorly matched repair mortar can damage certain historic masonry systems because differences in strength and moisture behavior may concentrate deterioration in the surrounding material.
Lime-based mortars and plasters are often appropriate for traditional construction, but they are not automatically the correct choice for every building.
Material selection should consider the original construction, exposure conditions, existing finishes, and the intended repair.
Where historic plaster remains sound, localized restoration can preserve original texture and reduce unnecessary demolition.
Insulation Materials
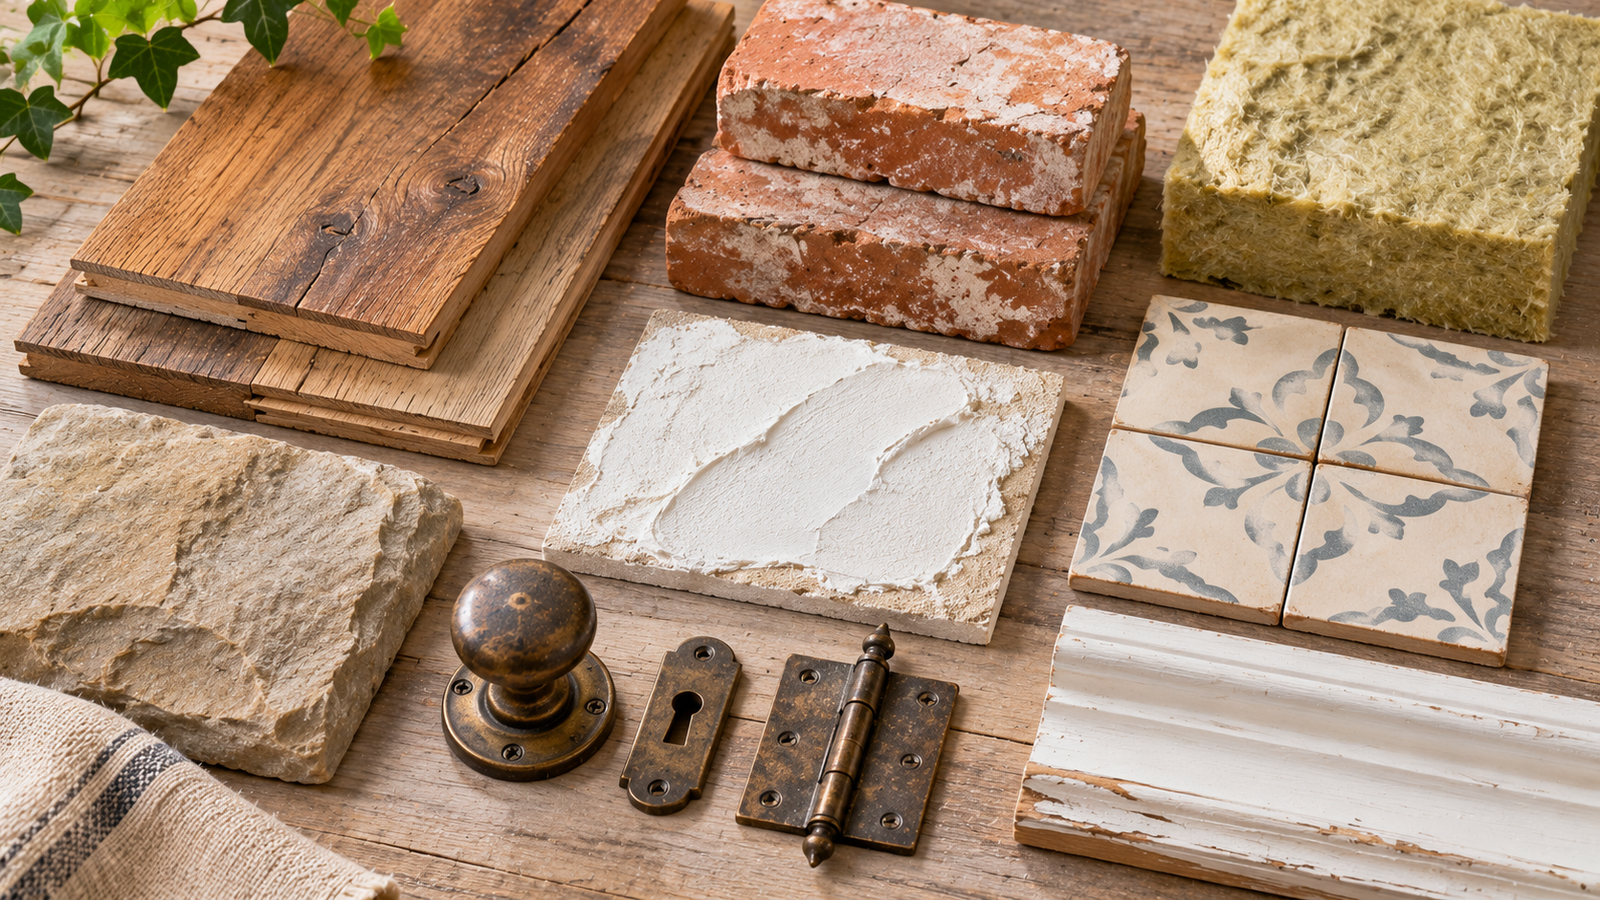
Common insulation products include mineral wool, cellulose, wood fiber, and various rigid insulation boards.
Mineral wool offers useful thermal, acoustic, and fire-performance characteristics when specified and installed correctly. Cellulose can fill irregular cavities, while wood-fiber systems may be useful in some traditionally constructed buildings.
However, these materials differ in vapor permeability, moisture storage, capillary behavior, thermal performance, and installation requirements.
Spray foam and other highly air-resistant or vapor-resistant systems may be suitable in certain assemblies but can create problems when they restrict drying or conceal defects in inappropriate locations.
The insulation system must be evaluated as a complete assembly, including moisture control, air barriers, junctions, and ventilation.
Flooring Materials
Original solid wood flooring can be an excellent candidate for restoration when sufficient sound material remains.
New solid wood, engineered wood, ceramic tile, natural stone, and resilient flooring each have different strengths.
Wood products respond to moisture and temperature changes, so installation conditions and subfloor preparation are important.
Ceramic and porcelain tile can work well in kitchens and bathrooms, provided the supporting structure, movement joints, and waterproofing are appropriate.
Stone flooring may complement traditional architecture, but its weight, surface characteristics, and compatibility with the supporting structure must be considered.
Windows and Doors
Original timber windows and doors can often be repaired, although their condition must be evaluated individually.
Where replacement is justified, choose products based on thermal performance, durability, maintainability, weather resistance, and appearance.
Historic buildings may benefit from custom profiles or restoration techniques that preserve original dimensions and architectural details.
Roofing Materials
Slate, clay tile, metal, and other roofing systems can be suitable for older homes depending on climate and structural design.
Roofing materials must be selected with attention to weight, roof slope, wind exposure, drainage, and the condition of the supporting structure.
A heavier roof covering should not be installed without confirming that the framing can safely support it.
Paints and Interior Finishes
Traditional limewash and mineral finishes may be appropriate for certain historic plaster or masonry surfaces.
Modern paints can also be suitable when their properties match the substrate and environmental conditions.
Low-emission finishes may help reduce indoor exposure to some chemicals, but product labels should not be treated as substitutes for proper ventilation and safe application.
Material Selection Guide
| Material or system | Potential application | What to verify |
|---|---|---|
| Lime mortar or plaster | Compatible traditional masonry repairs | Original material, strength, moisture behavior |
| Mineral wool | Suitable roof, wall, or floor assemblies | Assembly design, air sealing, moisture control |
| Cellulose insulation | Suitable enclosed cavities | Moisture condition, installation method |
| Wood-fiber insulation | Selected traditional building upgrades | Complete system compatibility and drying potential |
| Solid or engineered wood | Interior flooring | Subfloor condition, moisture, movement |
| Ceramic or porcelain tile | Kitchens, bathrooms, utility areas | Waterproofing, substrate stability |
| Secondary glazing | Improving suitable existing windows | Condensation control, appearance, operation |
| Rigid insulation systems | Selected roof, wall, or floor assemblies | Vapor control, thermal bridging, moisture risks |
The best material is not necessarily the most expensive or the most traditional. It is the material that performs appropriately within the complete building system.
13. Safety Tips During Renovation
Renovating an old house can expose workers and occupants to risks that are not immediately visible.
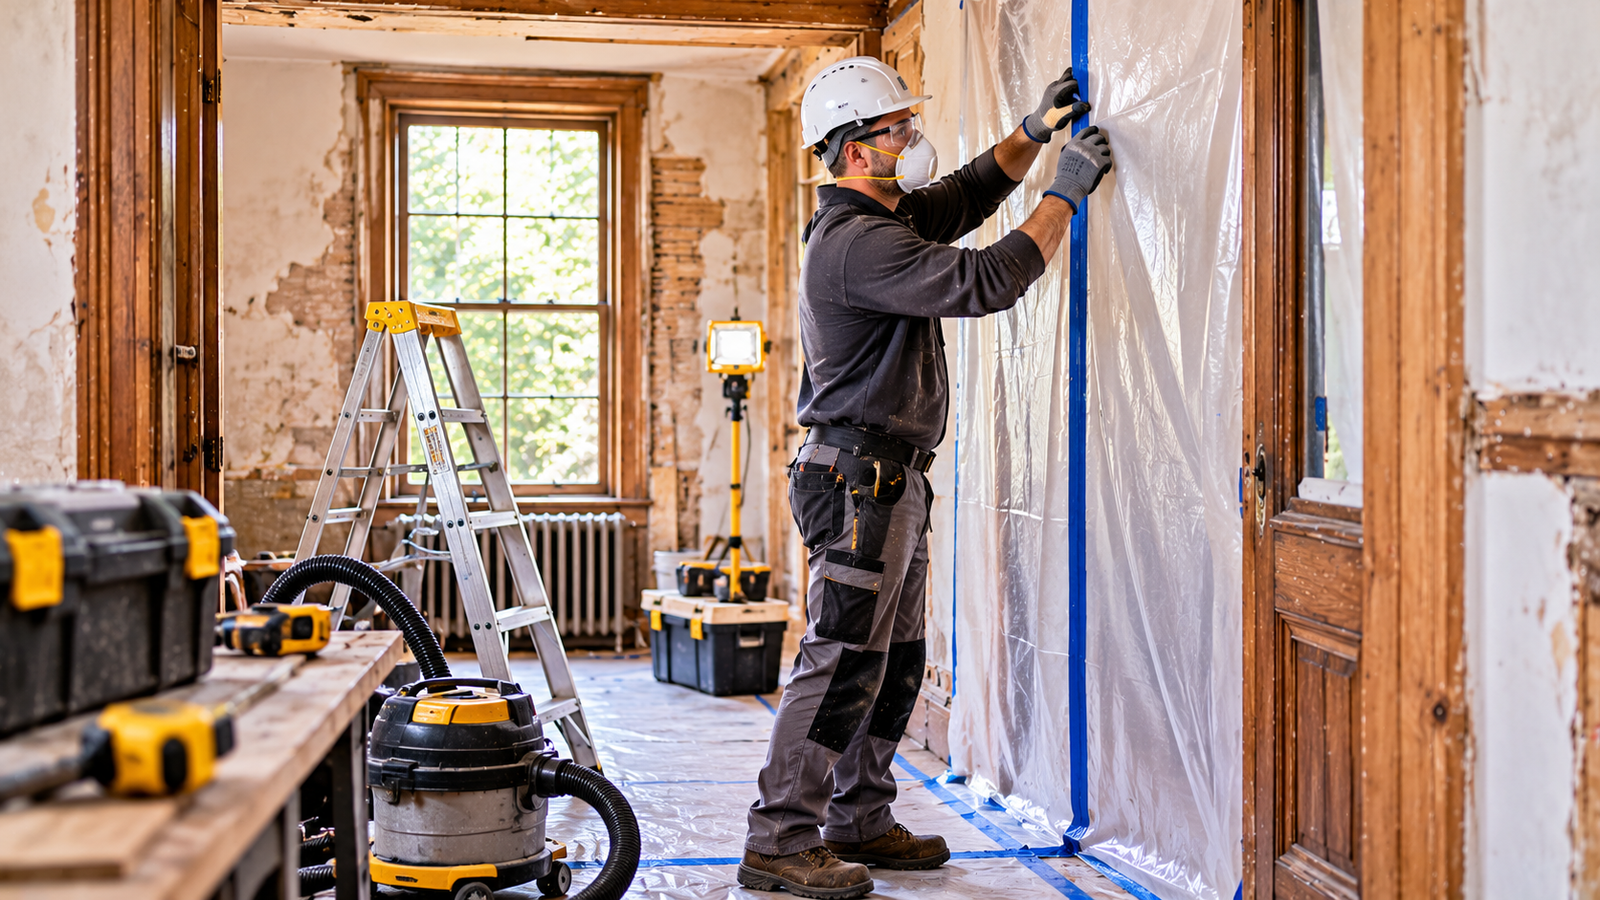
Safety planning should begin before demolition and continue throughout construction.
Establish Safe Work Areas
Construction zones should be separated from occupied parts of the property where practical.
Control access, provide adequate lighting, maintain clear walking routes, and ensure that materials and tools are stored securely.
Children, pets, and other occupants should not have access to active work areas.
Where structural instability or hazardous materials are present, the affected area may need to remain unoccupied until appropriate corrective work is completed.
Use Suitable Protective Equipment
Protective equipment should match the specific task.
Eye protection, gloves, hearing protection, protective footwear, and head protection may be necessary depending on the work.
Respiratory protection requires particular attention. An ordinary dust mask is not suitable for every airborne hazard.
Work involving lead, asbestos, or other hazardous substances may require specialist containment, equipment, training, and legal authorization.
Control Dust and Contamination
Construction dust can spread through ventilation openings, doorways, and occupied rooms.
Suitable barriers, controlled extraction, and task-appropriate cleaning equipment can reduce contamination.
However, suspected asbestos-containing debris should not be swept or vacuumed with ordinary household equipment.
Hazardous materials require appropriate specialist procedures.
Protect Against Electrical and Fire Hazards
Electrical systems should be made safe before work that could expose or damage wiring.
Do not rely on a switch position alone to establish that equipment is de-energized.
Isolation, testing, and work on electrical installations should be carried out by suitably qualified personnel in accordance with local requirements.
Gas systems, chimneys, fuel-burning equipment, temporary heaters, and electrical extension arrangements also require careful fire-safety planning.
Maintain suitable fire detection and emergency arrangements throughout the renovation.
Avoid Falls and Structural Accidents
Roof work, scaffolding, ladders, open floors, and unstable framing present substantial risks.
Specialist contractors should manage work at height and structural interventions where necessary.
Removing a wall, cutting joists, or modifying roof members without confirming their structural function can cause serious damage.
Know When Work Must Stop
If workers discover unexpected structural movement, suspected hazardous materials, a gas leak, exposed live wiring, or other immediate dangers, the affected work should stop.
The priority is to secure the area and obtain qualified assistance before continuing.
A renovation schedule should never take precedence over the safety of occupants and workers.
14. Mistakes to Avoid When Renovating an Old House
Many renovation problems originate from decisions made before construction begins.
Although hidden defects cannot always be predicted, several common planning mistakes are avoidable.
Treating Every Old Component as Defective
Replacing everything simply because it is old can increase costs and destroy repairable original features.
Age alone is not proof of failure.
Components should be evaluated according to condition, performance, safety, and the feasibility of repair.
Purchasing Materials Before Finalizing the Design
Ordering flooring, windows, cabinets, or bathroom fixtures too early can create problems if dimensions or layouts change after construction begins.
Major purchases should follow accurate measurements and coordinated designs.
Long-lead products can still be ordered in advance, but their specifications should be confirmed first.
Making Unnecessary Layout Changes
Removing walls or relocating plumbing can significantly increase renovation complexity.
Before changing the layout, determine whether the expected improvement justifies the structural work, new services, additional approvals, and disruption.
Sometimes modest changes to circulation, lighting, and storage provide better value than a complete redesign.
Choosing Contractors Solely by Price
An unusually low quotation may reflect incomplete scope, excluded work, unsuitable materials, or inadequate allowances.
Compare contractors using detailed specifications, qualifications, relevant experience, references, and clear contractual terms.
For historic or traditionally constructed properties, experience with older buildings can be particularly valuable.
Using Incompatible Materials
A modern repair material may perform well in new construction but cause problems in a traditional building.
For example, an unsuitable wall coating or mortar can interfere with moisture management in certain older masonry systems.
Material selection should be based on the building's actual characteristics.
Ignoring Future Maintenance
A renovation should not create systems that are unnecessarily difficult to maintain.
Consider access to shutoff valves, electrical distribution equipment, inspection points, ventilation components, and other serviceable installations.
A visually attractive finish is less valuable if routine maintenance requires major demolition.
Changing Specifications Without Reviewing Consequences
Late design changes can affect labor, materials, inspections, and the entire construction schedule.
Before approving a change, confirm its cost, technical implications, and effect on already completed work.
A disciplined decision-making process is one of the most effective ways to control renovation complexity.
15. Old House Renovation Checklist
A renovation checklist helps convert a large project into manageable stages.
The following checklist summarizes the principal tasks discussed in this guide. It is intended as a planning tool rather than a substitute for professional inspections, engineering designs, or legally required approvals.
Before Construction
- [ ] Complete a property condition assessment and identify structural or safety concerns.
- [ ] Investigate moisture problems and determine whether hazardous materials may be present.
- [ ] Define the renovation scope, long-term goals, and original features worth preserving.
- [ ] Verify applicable permits, heritage restrictions, and inspection requirements.
- [ ] Obtain detailed contractor estimates and prepare a budget with a contingency reserve.
- [ ] Confirm the design, materials, contractor responsibilities, and construction schedule.
During Construction
- [ ] Make work areas safe and protect the property from further damage.
- [ ] Complete approved structural repairs and necessary weatherproofing.
- [ ] Carry out controlled demolition and record unexpected findings.
- [ ] Install or upgrade concealed electrical, plumbing, heating, and ventilation systems.
- [ ] Complete required testing and inspections before closing walls or floors.
- [ ] Install compatible insulation, airtightness measures, and approved window improvements.
- [ ] Reconstruct surfaces, complete wet areas, restore original features, and finish interiors.
Before Completion
- [ ] Test building systems and verify the operation of installed equipment.
- [ ] Complete the final punch list and any required official inspections.
- [ ] Collect warranties, permits, certificates, photographs, and maintenance instructions.
After Moving In
Once the renovation is complete, establish a basic maintenance schedule.
Inspect roofing and drainage periodically, maintain heating and ventilation equipment, and monitor areas previously affected by moisture.
Older buildings benefit from regular observation because small defects can often be addressed before they develop into expensive repairs.
16. Frequently Asked Questions (FAQ)
Is renovating an old house worth it?
Renovating an old house can be worthwhile when the building has sufficient structural potential and the expected costs align with the homeowner's goals. The decision should consider repair requirements, long-term operating costs, location, and the value of retaining original features. A professional assessment is particularly important before committing to a property with significant visible damage.
What should you renovate first in an old house?
Start by inspecting the property and addressing immediate safety concerns. Structural instability, active water intrusion, and dangerous electrical conditions generally take priority over cosmetic work. The remaining renovation should be organized according to the dependencies between structural repairs, building systems, insulation, and finishes.
How much does it cost to renovate an old house?
Costs vary widely depending on location, size, condition, project scope, and labor rates. A modest cosmetic renovation and a comprehensive structural reconstruction cannot be compared using a single reliable average. Obtain property-specific estimates and include an appropriate allowance for unforeseen work.
Is it better to renovate or rebuild an old house?
Renovation may be preferable when major structural components remain usable and the existing building can meet the owner's needs. Rebuilding may deserve consideration when damage is extensive or the necessary alterations would be impractical. Both options should be evaluated using complete project costs, legal restrictions, and long-term requirements.
Can an old house be made energy efficient?
Yes. Many older homes can achieve substantial improvements in comfort and energy performance through appropriate insulation, air sealing, heating upgrades, and ventilation. The measures must be compatible with the existing construction, particularly where traditional walls manage moisture differently from modern assemblies.
Should original windows be replaced?
Not automatically. Original windows may be repairable, and weatherstripping or compatible secondary glazing can improve their performance. Replacement should be considered when the condition, functional requirements, or overall project assessment justify it. Historic restrictions may also influence the decision.
Can you live in an old house during renovation?
This depends on the extent of the work and whether safe living conditions can be maintained. Limited, phased renovations may allow continued occupancy, while major structural work, hazardous-material remediation, and prolonged utility interruptions may require temporary relocation.
What is the biggest mistake when renovating an old house?
One of the most damaging mistakes is beginning expensive improvements without understanding the condition of the property. Inspections, realistic budgeting, and coordinated planning reduce the risk of covering defects or having to dismantle newly completed work.
17. Conclusion
Renovating an old house is an opportunity to combine the character of an existing property with the safety, comfort, and functionality expected from a modern home.
The most successful projects begin with understanding the building rather than immediately changing its appearance. Thorough inspections, realistic budgets, careful construction sequencing, and suitable materials help reduce unexpected costs and prevent avoidable mistakes.
Preserving original features can add lasting value, while thoughtful energy improvements and reliable building systems can make an older home more comfortable and practical for everyday living.
Every old house is different, and the right renovation strategy depends on its construction, condition, location, and intended use.
By approaching the work systematically and involving qualified professionals where necessary, homeowners can transform an aging property into a durable, functional, and welcoming home without losing the qualities that make it special.